One Smart Little Cookie is a collection of everything that brings inspiration, comfort and beauty into my life and home.
I love to create a beautiful home and enjoy it with my family.
It is sharing
what I love to do; baking and cooking in a healthier way without sacrificing flavor
, crafts,
party planning, activities, organization, and home decor.

Being a "Smart Little Cookie" is not about being perfect, it is about knowing how to enjoy life and family to it's fullest~to your fullest.
Due to my creative process, my home gets messy, my kids play in their jammies-all day sometimes (the terribly relaxed days tend to be my favorite),
and my hubby has become much more patient and supportive over the years with all of this.
In fact, he often has his own creative ideas and we both find ourselves anticipating our upcoming projects together~love him!
Don't get me wrong, I LOVE a clean house, but I've rejected denial, and with a toddler who is a budding creative type herself,
I feel accomplished when the dishes are in the dishwasher before naptime (not mine, hers).
I've accepted the fact that "spotless" cannot mean what I have always
envisioned in my mind, at least not with kids,
and I would rather enjoy my kids and beautiful home, than a spotless, sterile home.
I have learned to take each day, one day at a time, and everyday should leave us feeling inspired and more contented.
The day should leave us, whispering in our ear, "the day has been as well as it could have been done, and it has been done well."

Go ahead and take a bite, indulge yourself and try my recipes and crafty creations in your own home.
I hope to inspire you to feel like the "Smart Little Cookie" you are!


Tuesday, February 14, 2012

Happy Valentine's Day!

There are a couple of crafts I found on some great blogs via Pinterest that I want to share with you today. I know it's Hearts Day today, so if you feel so inclined, you can make something quick, or tuck these little gems in your pocket for the next Valentine's Day! 
~They are very easy projects!

#1: Crayon Hearts


I made these adorable and fun crayon hearts for my daughter's preschool class for her friends and classmates.  So fun, quick and easy!  Just click this link for the original tutorial: 

#2: Cupid's Arrow Valentine Cards


I love these Cupid's Arrows! I made them for my oldest daughter's school class and they were so easy peasy to make! All you need is a pencil and paper for each one.  And, it's a free download from this site:

~

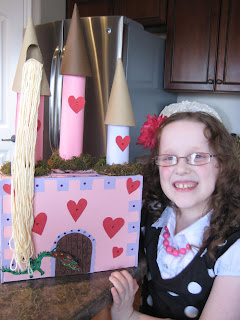
Rapunzel's Castle Valentine Box


This is a project my oldest daughter and I designed and made together.  It became a family affair with Rapunzel's hair being my husband's brilliant idea. 
I cut a slit on the top for her sweet Valentine's and she was ready to go.
I think her Valentine box turned out Fantastic!


Happy Valentine's Day!


Thursday, February 2, 2012

Cooking Mama Birthday Party


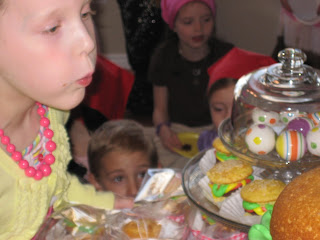
My daughter's have always asked to have princess parties to celebrate their birthdays with their friends and that is what I have been used to putting together and throwing for them.  This year my 8-years-old daughter asked to have a Cooking Mama party.  I was going between feelings of sadness that for the first time ever in our family, The Disney Princesses weren't going to make their annual debut; and a little excited to plan something completely different.  I first googled "Cooking Mama Birthday Party"...nothing came up on the internet.  I couldn't believe the theme was nowhere in the realms of "internet space"!  Apparently, Cooking Mama is part of the Wild Frontier of birthday parties.  So, to my birthday party planning board I went and this is what I put together for her.


  Hamburger Cake

I usually bake from scratch because that's what I enjoy doing.  But with a guest list of 26 cute and silly friends, I went the boxed route.  No biggie! It made my life so much easier to do it this way.  I purchased enough boxed yellow cake mixes, brownie mixes and sugar cookie mixes to make the yummy treats I needed for the party.

This cake is fairly simple to make.  I baked a yellow cake mix in a regular round cake pan and a second yellow cake in a Pyrex glass bowl.  Spray each with Pam Cooking Spray For Baking~it has flour mixed into the spray making it much easier to turn the cakes out of the pans.  While the yellow cake "hamburger buns" are cooling, mix one brownie mix and pour into a round cake pan (either the same pan that has been completely washed, or another pan exactly the same size as the one previously used).  Bake the brownie "hamburger patty" just until set.  Remove from the oven, turn out of pan and let cool completely.
Now assemble the hamburger cake with lettuce, mustard and ketchup Frosting, here's how:

This is another of my favorite frosting recipes~
(You can use canned frosting too, nothing wrong with that.  Whatever makes your day easier! I just enjoy the flavor of homemade frosting best.)

Perfect Buttercream Frosting

                                     5 T butter                    2 1/3 c powdered sugar
                                     dash of salt                   1/2 t vanilla extract
                                     3 T milk                       red, green, yellow and blue food coloring
                                          
 Soften butter, add salt and powdered sugar.  Beat until smooth and fluffy.  Add vanilla extract.  Separate frosting into 4 different medium sized bowls.  Keep one bowl of frosting white (mayonnaise), add red food color (a lot!) into another bowl with 1 very tiny drop of blue (this will make the ketchup a little bit deeper in color), add yellow (again, a lot!) into another bowl (mustard), and in the last bowl add a few drops of green (lettuce).
Fill 1freezer Ziploc baggy (thicker than the regular baggies) with red, another with yellow and last with green.  Cut a small tip off of the corner of each baggie, set aside.

First place bottom hamburger bun on a cake stand or plate, using the white frosting frost a medium size inner circle on top of the bottom bun.  Place round brownie center on top.  Frost a smaller inner circle on top of the brownie layer, also pipe each condiment frosting as desired for the lettuce, mustard and ketchup.  Place top cake bun on top of the brownie layer.   Place in refrigerator until ready to display and serve.  That's it, you're done!


Mini Hamburgers and Sugar Cookie Fries
 
Next I found this great tutorial for Mini Hamburgers and Sugar Cookie Fries here:  
http://www.bakerella.com/fast-food-fun/ I think the buns came out much more realistic and cute when I left them in the oven until they were a medium golden brown.

I made these as part of the party favors.  I made a small "Cooking Mama" card to add to the theme and slipped them into each of the vellum fry holder's I made.  I also made the paper food trays which I downloaded from here: http://zakkalife.blogspot.com/2010/03/how-to-make-paper-food-baskets.html.  I googled "red gingham images" and found  a cute pattern I liked.  I then resized it and printed the pattern onto cardstock, reran it through the printer with the paper food tray download and made enough for each guest at the party.  I then lined each paper food tray with tracing paper and added the hamburger cupcake and sugar cookie fries.


Sugar Cookie Fries with Mustard and Ketchup Frosting

I used the extra Sugar Cookie Fries and condiment frostings as part of the treats at the party. I also made Peanut Butter and Jelly Sushi Rolls and Honey Caramel Popcorn.


Games!
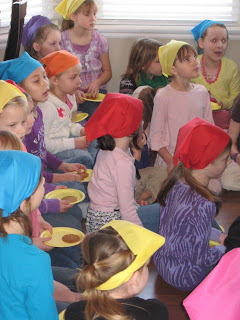
  As each guest arrived they chose a handkerchief to wear on their heads like Cooking Mama.  The boys can wear the handkerchiefs around their necks like a chef.  They chose from Red, Pink, Orange, Yellow, Green, Blue and Purple.


Marshmallow Skewers

 
The kids had 15 seconds on a timer to put 5 large marshmallows on their sticks.  This one was a lot of fun!

  
Hot Dog! (Hot Potato)

My husband found the cutest plush hamburger and hot dog at the dollar store.  We played Cooking Mama music from Youtube as they passed the Hot Dog around as quickly as they could! 


Egg Relay Race

I hard boiled 3 eggs and split everyone into teams of two.  One person had to walk across the room balancing an egg on a plastic fork in their mouth, while the other tried to catch the egg being dropped into a cupcake cup at the end.  Lot's of fun and giggles!


Cook The Fish In The Pot Toss


Frost The Cookie...and eat it!

30 seconds to frost and eat their cookies.


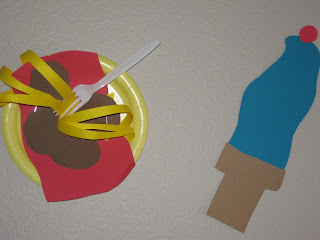
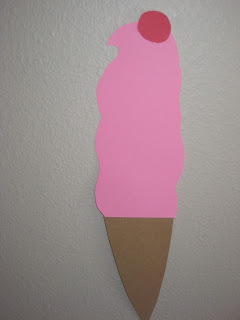
Decorations


The Party Fun


The Birthday Girl


Cooking Mama says, 
"It's Delicious!" 


Friday, December 23, 2011

So this is my little Luci's first Christmas, and as a tradition in our family I make each of our children's stockings.  I just finished hers today~

The front


and the back


I love how it turned out!~

Now onto what has been developing in our home.  Our elf, Pinocchio, has been pretty busy it seems when he returns from reporting to Santa...


Our daughter's have waken up twice to find him being sweet to Snow White! Little rascal.

I guess when Snow White isn't around for games and stories, he get's a little bored and into mischief...he opened one of our family gifts!


My husband has now become a master doughnut maker.

Pinocchio also crowned our Christmas Tree with Mrs. Potato Head...poor Mrs. Potato Head.


 How can you get upset with an elf that studies the Bible?


And holds Baby Jesus.


We can't wait to have him back in our home next year!

 Besides yummy doughnuts, we've been enjoying a delicious goat cheese my friend introduced me too a few weeks ago, it's Amazing! But top that cracker with Boursin goat cheese and homemade "Crazy Tangy Cranberry Sauce" another friend made, and you get Christmas on a cracker in two bites.


Thursday, December 15, 2011

Chocolate Candy Cane Hearts

I found these Adorable candy cane hearts on glorioustreats.blogspot.com.  They're so cute and so simple to make!  My favorite kind of crafty treat.
I think they're the perfect Christmas treat for my daughter's amazing school teacher.


Pick your candy canes, mini or large, I used large.  Place a piece of parchment paper on a cookie sheet.  Place candy canes on parchment paper and position into heart shapes.  

For 2 large hearts, melt 1/3 bag white chocolate chips (I used Ghirardelli) for 30 seconds at a time.  White chocolate never fully melts to the same consistency as milk or dark chocolate without caking.  So melt it carefully, mixing with a fork in between melting times until you get a spoonable consistency.  

While chocolate is melting I like to crush one candy cane into a mixture of small chunks and powder.  
Spoon chocolate into 1 heart at a time.  If the candy canes move around, reposition them together and continue spreading until the chocolate is touching all interior sides of the heart.  

Sprinkle with crushed candy canes.  I also used white sugar crystals to give my hearts an extra fancy touch and sparkle!

Place cookie sheet into freezer for 10 minutes until chocolate has set.  Take out of freezer and place on counter until the hearts reach room temperature.  


Package as you wish! I'll be placing mine inside cellophane bags with ribbon to finish.


Smart Little Cookie Tip:
You can use any sprinkle your heart desires; jimmies, colored sugar sprinkles, crushed cookies...also, you could use milk or dark chocolate to fill the hearts.